 Rated Excellent
How to Bleed a Radiator | Building Supplies Online

How to Bleed a Radiator
As with anything new, bleeding radiators for the first time can be daunting but like most things it can actually be a pretty easy and satisfying task once you know how.
Bleeding radiators is a necessity to keep them in tip-top condition and in full working order and ensure they remain energy efficient. We recommend you go through an annual process of bleeding radiators in your home or office even if they are functioning as they should be; either before or after the winter months is a good annual habit to get in to.
The process of bleeding radiators involves the letting out of air bubbles trapped inside the radiator meaning the water inside doesn’t circulate around as it should do. When this happens, and we don’t take action then cold spots within the radiator will occur reducing heat efficiency, therefore slowing up the heating process and will be poor performing overall. Heating bills therefore are inevitably increased whilst all of this can easily be prevented.
“How Do I Recognise If My Radiators Require Bleeding?”
Tell-tale signs that you need to be bleeding radiators are:
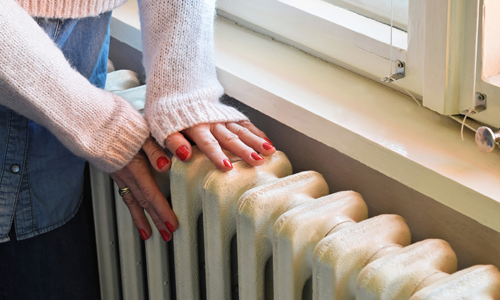
- Your radiator is cooler to the touch at the top and warmer to the bottom
- The radiator is making a gurgling noise or an unusual sound
- It takes longer for your radiators to heat up than normal
You will need the following items before you start:
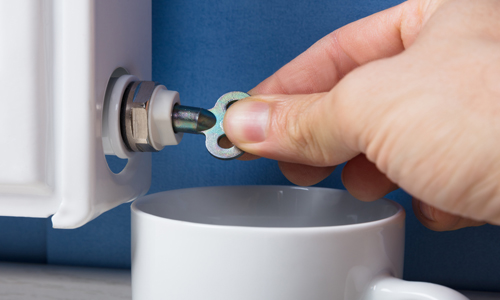
- A radiator key
- 2 cloths and a small container to catch any water that drips or sprays out
You will need to bleed a radiator in two instances:
- Once a year to all your radiators (try to make it the same time of year so you don’t forget)
- If you identify a specific radiator is not working to it’s full capacity.
So, read on to identify our easy 7-Step guide on how to master the bleeding of a radiator:
- Ensure your central heating is off and radiators have completely cooled down before starting. This will eliminate any scalds or burns as well as any unnecessary water on the floor as the water circulation will have settled down.
- Turn the valve (found at the top of your radiator) anti-clockwise using your radiator key and a cloth wrapped around your hand to prevent any scalds just in case any boiling hot water does escape. Once turned, you should begin to hear a small releasing ‘hiss’ sound. This is the start of any air bubbles now escaping. That’s a good thing! It may be now when any water leaks out.
- Only once you are sure the hissing sound has stopped, turn the radiator key back the opposite way to clockwise. If water is coming out still, then act quickly, as you don’t want to lose too much water from the radiator as this will affect the overall boiler pressure (see below).
- Turn your central heating back on again.
- Go to your main boiler to identify if the pressure has dropped at all by assessing where the needle is sitting on pressure gauge. Ideally the needle should be sitting somewhere within the green panels. If the pressure gauge indicates it is in the ‘red’ (early numbers) then this means it is indeed low on pressure. Don’t worry, this can occur sometimes when bleeding radiators and is easily rectified by adding more water to the boiler. On your boiler there should be a tap or a lever (Filling Lever or loop) to do this. If unsure, please refer to your boiler manual guide. Note: On other occasions your pressure gauge may be on the alternative red panel (the higher numbers – this means there is too much pressure/water in the system and you would need to complete the above bleeding of a radiator (probably just the one required) to bring the overall pressure back to normal again). The pressure within the boiler will probably be required to be topped up at least once a year.
- You should find your radiators are now heating up evenly as they should be and warming up your toes nicely and more efficiently now.
- Put the kettle on as you have earned yourself a relaxing cup of tea!